
When an Online Store product is set up as a sponsorship, the purchaser can submit sponsor information during checkout.
The purchaser can provide:
- their company or Sponsor name;
- a website address; and
- a Sponsor logo.
When a logo is uploaded, EventCaddy automatically adds the Sponsor under Event Website > Sponsors for review.
Enable sponsor-information collection
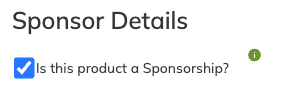
Sponsor-information fields appear only when the Online Store product has been set up as a sponsorship.
To enable them:
- Go to Finances & Commerce > Online Store.
- Create or edit the sponsorship product.
- Select Is this product a Sponsorship?
- Review the remaining product settings.
- Create or save the product.
For complete sponsorship setup instructions, see Selling Sponsorships Through the Online Store.
When does the Sponsor submit their information?
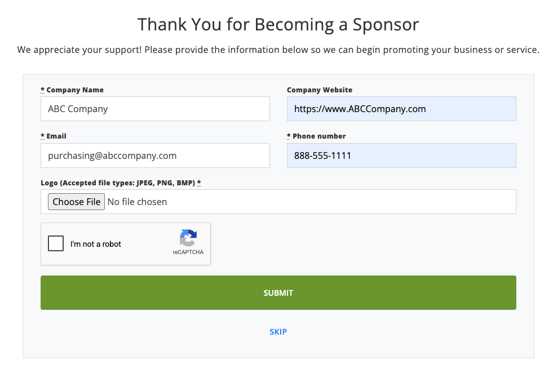
The point at which Sponsor information is requested depends on the payment method.
| Payment method | When the Sponsor-information step appears |
|---|---|
| Cash or check | After the purchaser selects the payment method |
| Stripe or PayPal | After the payment is completed successfully |
For Stripe and PayPal purchases, the Sponsor-information step does not appear until the payment succeeds.
What happens when a logo is uploaded?
When the purchaser uploads a logo:
- EventCaddy creates a Sponsor under Event Website > Sponsors.
- The submitted Sponsor name, website address, and logo are added to the Sponsor.
- The Sponsor is assigned to a Sponsor Category based on the purchased Online Store product name.
- The Sponsor is hidden by default.
- The tournament organizer reviews the submitted information.
- The organizer makes the Sponsor visible when it is ready to appear publicly.
Important: Automatically created Sponsors are hidden so the submitted logo and information can be reviewed before appearing on the Tournament Website.
What happens when no logo is uploaded?
When the purchaser does not upload a logo, EventCaddy does not automatically create a Sponsor under Event Website > Sponsors.
The sponsorship purchase is still recorded in the Online Store and tournament transactions.
When the purchaser should still be recognized, add the Sponsor manually under Event Website > Sponsors.
Review a submitted Sponsor
After a purchaser uploads a logo:
- Go to Event Website > Sponsors.
- Locate the newly added Sponsor.
- Review the Sponsor name.
- Confirm that the logo is clear and appropriate.
- Check the website address.
- Confirm the Sponsor Category.
- Edit any incorrect or incomplete information.
- Make the Sponsor visible when it is ready to be displayed.
The Sponsor will not appear publicly while it remains hidden.
For detailed visibility and display instructions, see Displaying Sponsors on Your Tournament Website.
Sponsor Category created from the product name
When a logo is uploaded, EventCaddy uses the purchased Online Store product name as the Sponsor Category name.
| Online Store product name | Sponsor Category |
|---|---|
| Gold Sponsor | Gold Sponsor |
| Silver Sponsor | Silver Sponsor |
| Hole Sponsor | Hole Sponsor |
When creating Sponsor Categories manually, use the exact same name as the related Online Store product. Matching the names helps prevent duplicate categories.
For example, Gold Sponsor and Gold Sponsors may be treated as separate categories.
Sponsor Categories can be renamed and rearranged later under Event Website > Sponsors.
When a submitted logo needs to be replaced
The tournament organizer can replace or update the logo after checkout.
To update it:
- Go to Event Website > Sponsors.
- Locate the Sponsor.
- Select the Edit icon.
- Replace the logo or update the Sponsor information.
- Save the changes.
- Confirm that the Sponsor is visible when it is ready to appear publicly.
Frequently Asked Questions
Why did the purchaser not see the Sponsor-information fields?
Confirm that Is this product a Sponsorship? is selected for the Online Store product.
For Stripe or PayPal purchases, the fields appear only after the payment has succeeded.
Why did the purchaser not appear under Sponsors?
A Sponsor is created automatically only when the purchaser uploads a logo.
When no logo is uploaded, add the Sponsor manually under Event Website > Sponsors.
Is uploading a logo required to complete the sponsorship purchase?
No.
The purchaser can complete the purchase without uploading a logo. However, EventCaddy will not automatically create a Sponsor when no logo is submitted.
Why is the submitted Sponsor hidden?
Sponsors created through checkout are hidden by default so the tournament organizer can review the logo, name, website, and category before displaying the Sponsor publicly.
Can I add the Sponsor manually?
Yes.
Go to Event Website > Sponsors and select Add a Sponsor.
This can be done whether the sponsorship was purchased online or paid for another way.
Can I replace the logo after checkout?
Yes.
Edit the Sponsor under Event Website > Sponsors and upload the replacement logo.
Why was a separate Sponsor Category created?
The existing manually created Sponsor Category may not exactly match the Online Store product name.
Use matching names to help prevent duplicate categories.
Related articles
- Selling Sponsorships Through the Online Store
- Displaying Sponsors on Your Tournament Website
- Sponsors Overview
- Selling Sponsorships vs. Displaying Sponsors
- Creating Online Store Products