
Event Caddy’s Website Editor is the existing tab-based interface for customizing your Tournament Website.
From Event Website > Website Editor, you can manage homepage content and layout, your logo and banner, Photo Gallery, Downloadable Files, Additional Pages, and Custom Names.
Note: Event Caddy also provides the newer Inline Website Editor (Beta), which edits the same underlying Tournament Website and includes additional website features. Changes made to shared settings in either editor are reflected in the other.
Table of Contents
- Customize the Home Page
- Manage Your Logo and Banner
- Manage the Photo Gallery
- Manage Downloadable Files
- Create and Manage Additional Pages
- Create Custom Names
- Frequently Asked Questions
Customize the Home Page
Select Event Website > Website Editor > Home Page.
The Home Page tab controls the content, order, visibility, and action-button appearance of your Tournament Website homepage.
Manage Homepage Sections
The Home Page can contain sections including:
|
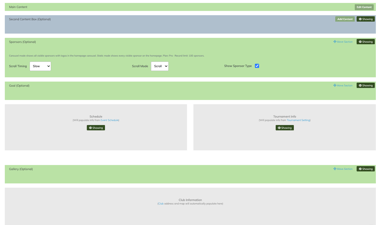 |
Use the available Showing controls to show or hide a section.
For sections that support ordering, select Move Section and reposition the section where you want it to appear.
When finished, select Save at the bottom of the page.
Important: Hiding a section here changes only its homepage display. It does not disable the underlying Event Caddy feature or delete its data.
Edit Main and Secondary Content
Select Edit Content or Add Content for the content area you want to change.
The rich-text editor can be used for formatted text, links, images, lists, tables, and other website content.
Save the content when finished, then save the Home Page where required.
Control Sponsor Display
The Sponsors (Optional) homepage section controls how visible Sponsor logos are presented.
| Setting | Options / behavior |
|---|---|
| Scroll Timing | Slow, Average, or Fast |
| Scroll Mode | Scroll or Static |
| Show Sponsor Type | Displays Sponsor Category labels when applicable |
Scroll moves Sponsor logos across the homepage.
Static displays all visible Sponsors grouped by Sponsor Category. When Static is selected, Sponsor Categories are displayed regardless of the Show Sponsor Type setting.
Sponsor records, categories, logos, and individual Sponsor visibility remain managed by the Sponsors feature. See Displaying Sponsors on Your Tournament Website.
Schedule and Tournament Info
Schedule and Tournament Info are separate homepage display controls.
The Schedule is populated from the Event Schedule configured in Event Caddy. For schedule setup, see Creating and Managing Your Day-of-Event Schedule.
Tournament Info is populated from existing tournament settings such as the tournament date, Event Time, holes, Groups/Hole, and Golfers Per Group.
Club Information
Club Information is populated automatically from the golf course selected for the tournament.
Customize Homepage Buttons
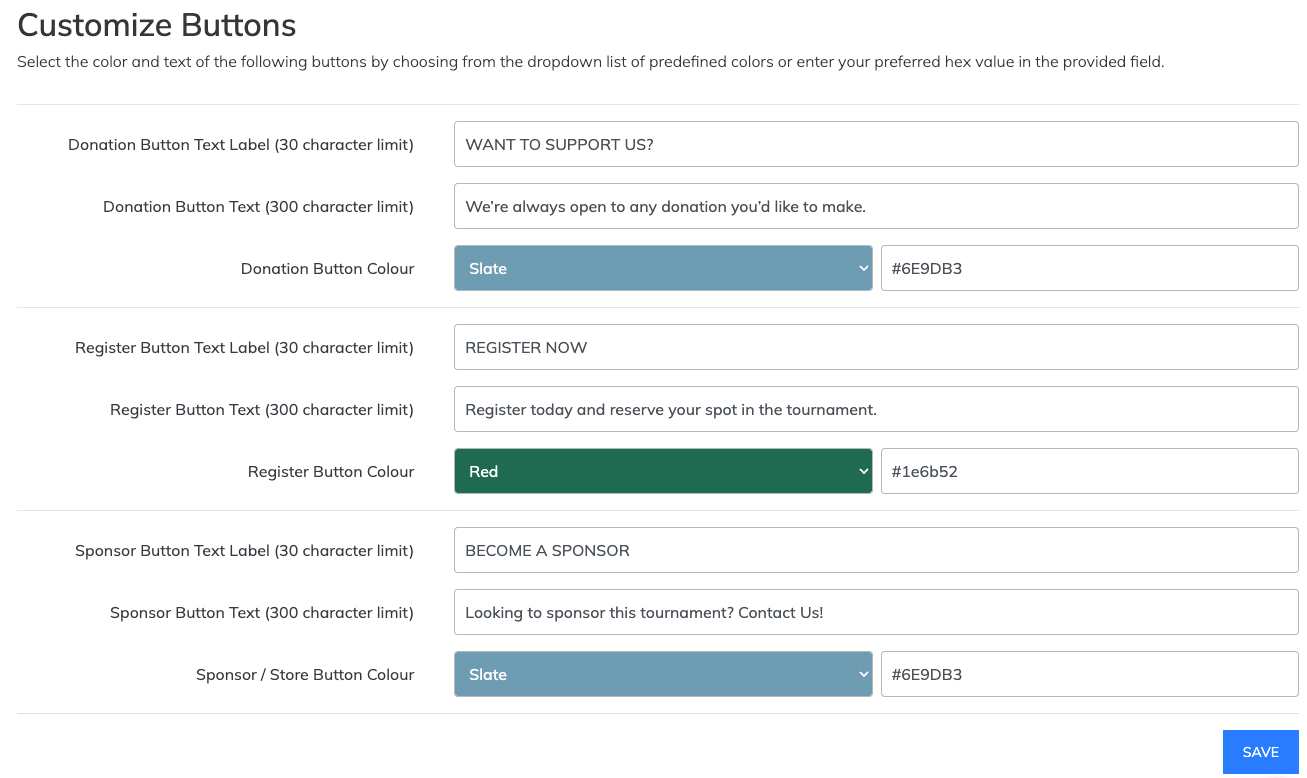
The lower portion of the Home Page tab lets you customize the Donation, Register, and Sponsor/Store homepage buttons.
For each button, you can change:
| Setting | Existing Website Editor limit |
|---|---|
| Button Text Label | 30 characters |
| Button Text | 300 characters |
| Button Colour | Preset color or custom HEX value |
Select Save when finished.
Important: Customizing a button’s text does not change its destination. For example, changing the Store/Sponsor button wording does not change the underlying Online Store destination.
The existing Website Editor uses different text limits than the Inline Website Editor (Beta). Follow the limits displayed in the editor you are currently using.
Manage Your Logo and Banner
Select Event Website > Website Editor > Logo & Banner.
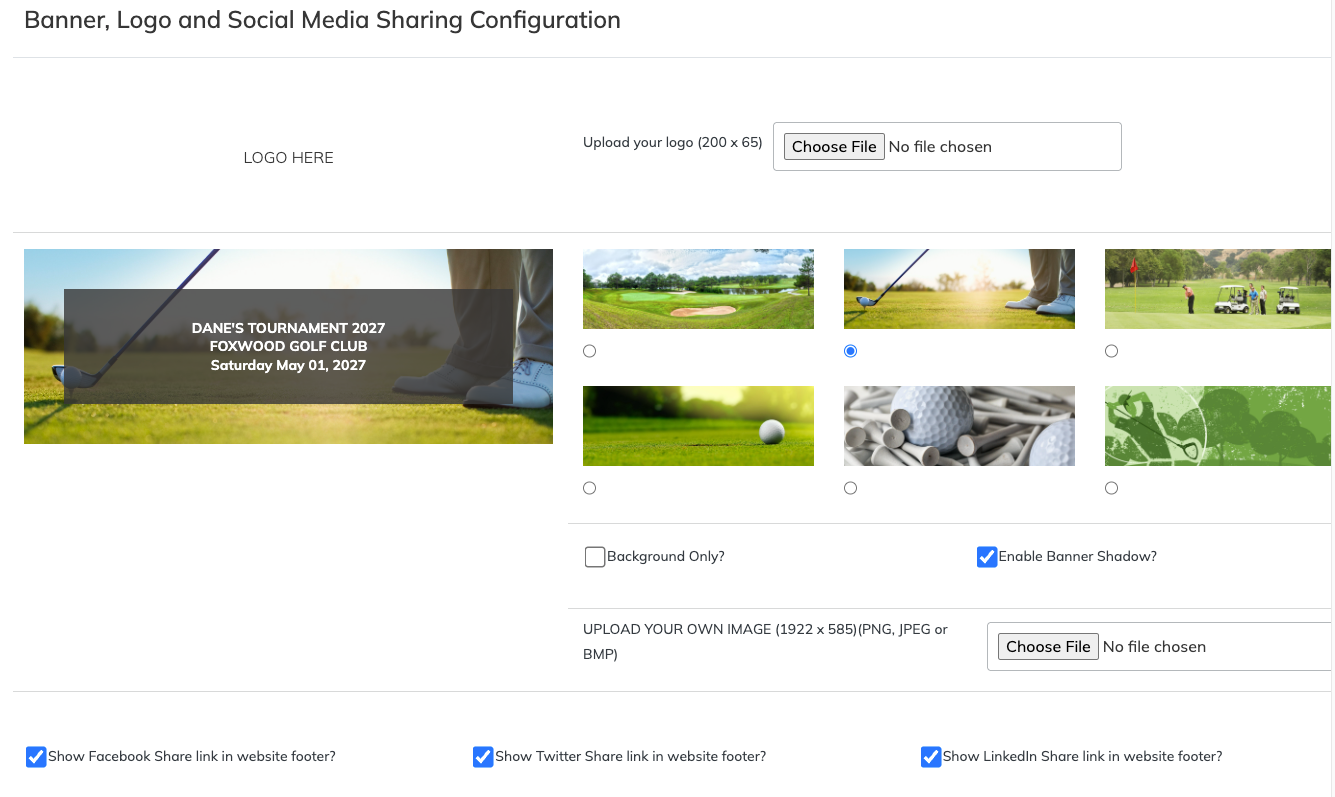
This tab controls your website logo, homepage banner, and footer social-sharing links.
Upload Your Logo
The recommended logo size is 200 × 65 px.
- Select Choose File beside Upload your logo.
- Choose your logo image.
- To remove an existing logo instead, enable Remove Logo?
- Select Save Settings.
Choose a Homepage Banner
You can select one of Event Caddy’s preset banner images or upload your own.
For a custom banner, the recommended size is 1922 × 585 px. Supported image types are PNG, JPEG, and BMP.
You can also use:
| Setting | What it does |
|---|---|
| Background Only? | Displays the banner image without tournament information over it. |
| Enable Banner Shadow? | Adds a background/shadow behind the tournament information to improve readability. |
Select Save Settings after making changes.
Add Social Share Links
The Logo & Banner tab also includes options to show:
- Facebook Share
- Twitter Share
- LinkedIn Share
These are visitor sharing controls. They let someone share the Tournament Website through the selected service; they do not link to your organization’s own social-media profiles.
Select Save Settings after changing these options.
Manage the Photo Gallery
Select Event Website > Website Editor > Photo Gallery.
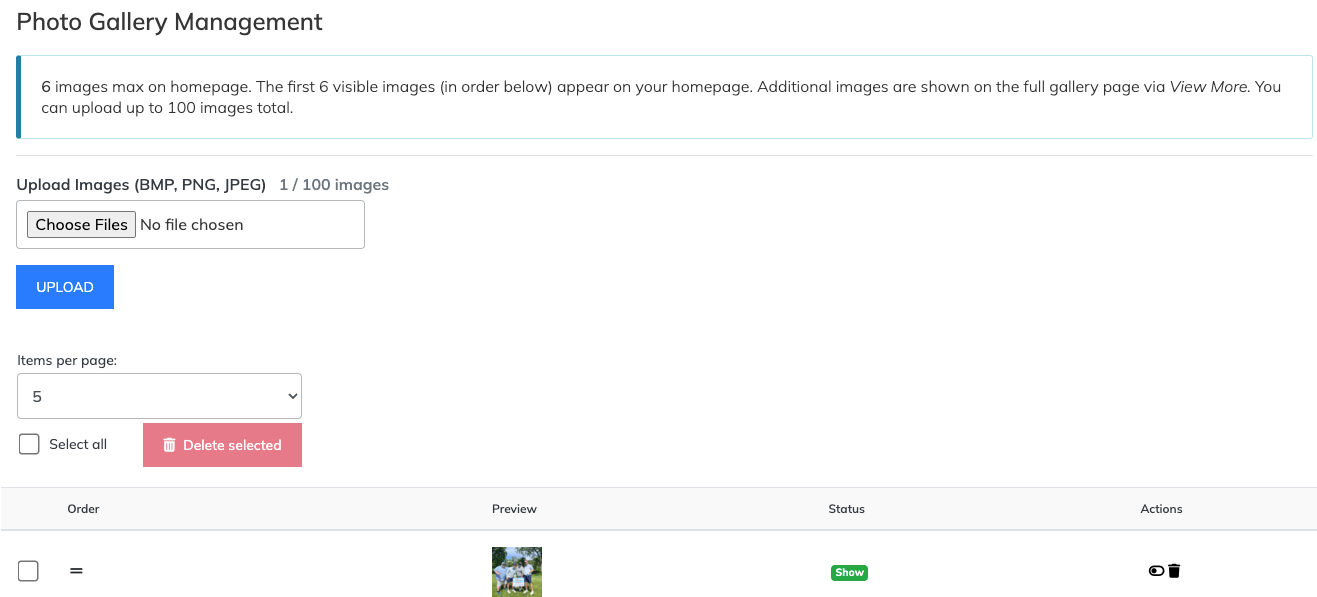
The Photo Gallery can contain up to 100 images. Supported image types are BMP, PNG, and JPEG.
The first six visible images, based on their current order, appear in the homepage Gallery section. Visitors can use View More to see additional visible images on the full Gallery page.
Upload Images
- Select Choose Files.
- Select the images you want to upload.
- Select Upload.
Manage Existing Images
From the Photo Gallery list, you can:
- drag images to change their order
- show or hide an image
- delete individual images
- select multiple images for deletion
Changing the image order also changes which six visible images appear on the homepage.
For the newer visual Photo Gallery workflow, see Managing Pages and Website Content with the Inline Website Editor (Beta).
Manage Downloadable Files
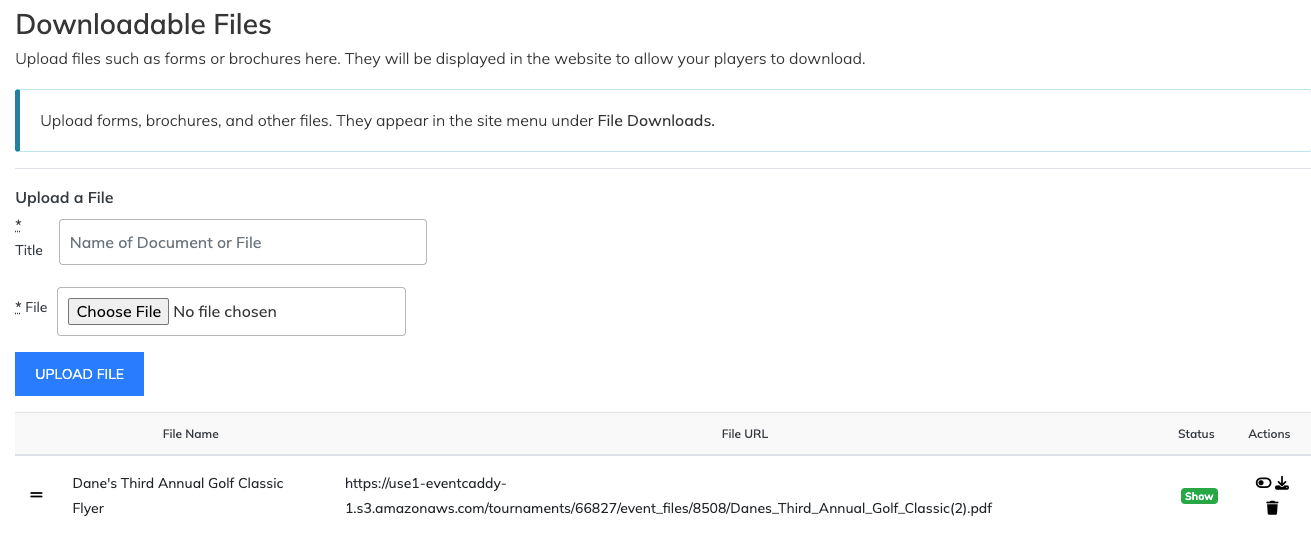
Select Event Website > Website Editor > Downloadable Files.
Downloadable Files let you provide forms, brochures, PDFs, rules, flyers, and other files through the Tournament Website.
Visible files appear under File Downloads.
Upload a File
- Enter the display name under Title.
- Select Choose File.
- Choose the file from your device.
- Select Upload File.
Files can be up to 10 MB each.
Manage Existing Files
The file list includes the:
- File Name
- File URL
- Status
- available actions
You can reorder, show/hide, download, or delete uploaded files.
The existing Website Editor displays the direct File URL in the file list, making it easy to copy the URL for use elsewhere.
Important: Hiding a file removes it from normal File Downloads display but does not invalidate its direct File URL. Anyone with the direct URL can still access the file.
This is useful when linking to a document from an Email Blast. See Sending Emails with Communication Tools.
Create and Manage Additional Pages
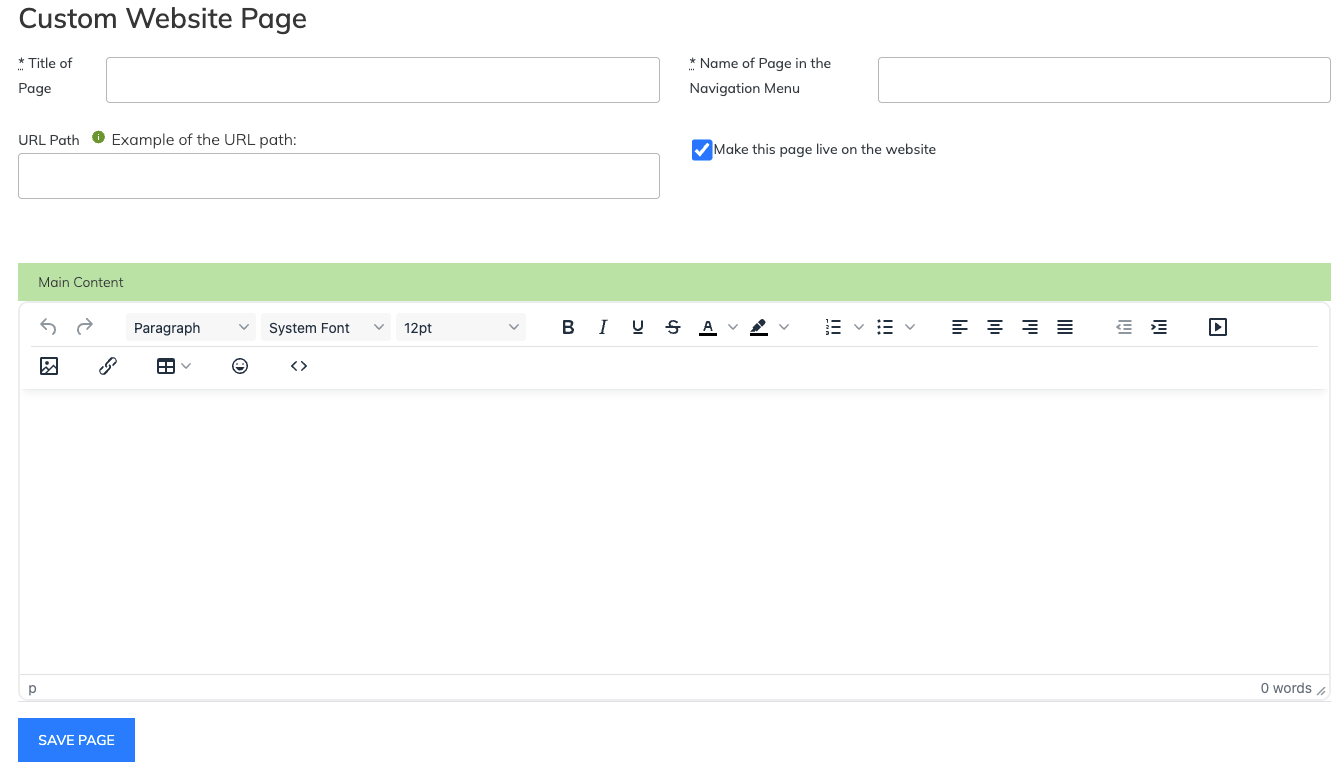
Select Event Website > Website Editor > Additional Pages to create custom pages for content that does not belong on the homepage.
Additional Pages can be used for tournament rules, accommodations, volunteer information, contests, directions, or other event-specific information.
Create an Additional Page
- Select Add New Page.
- Enter the Title of Page.
- Enter the Name of Page in the Navigation Menu.
- Optionally enter a URL Path.
- Enable or clear Make this page live on the website.
- Add the page content under Main Content.
- Select Save Page.
The Page Title and Navigation Menu name can be different.
Set a Custom URL Path
Unlike the Inline Website Editor (Beta), the existing Website Editor currently includes a URL Path field for Additional Pages.
Use it when you want to customize the page’s website path.
Show or Hide an Additional Page
Make this page live on the website controls whether that Additional Page is publicly available through the normal website experience.
From the Additional Pages list, you can also manage existing pages, including their order, visibility, editing, and deletion.
Create Custom Names
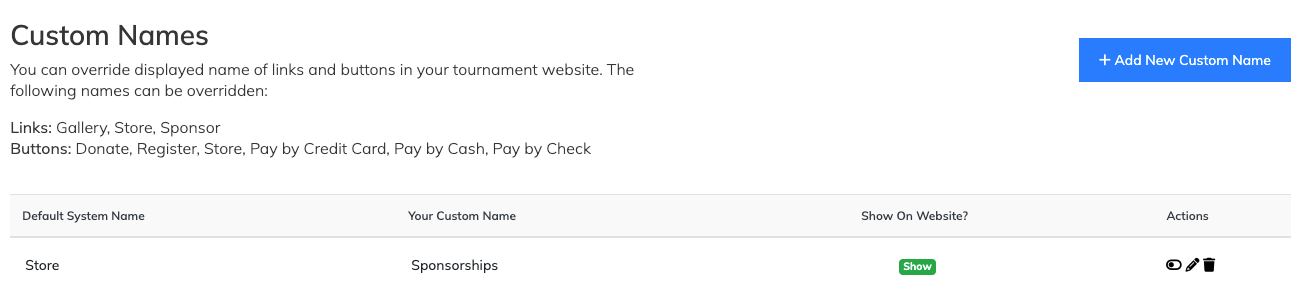
Select Event Website > Website Editor > Custom Names.
Custom Names let you replace default website, header, and checkout labels with wording that better matches your tournament.
This is the existing Website Editor equivalent of Labels & navigation in the Inline Website Editor (Beta).
Labels You Can Customize
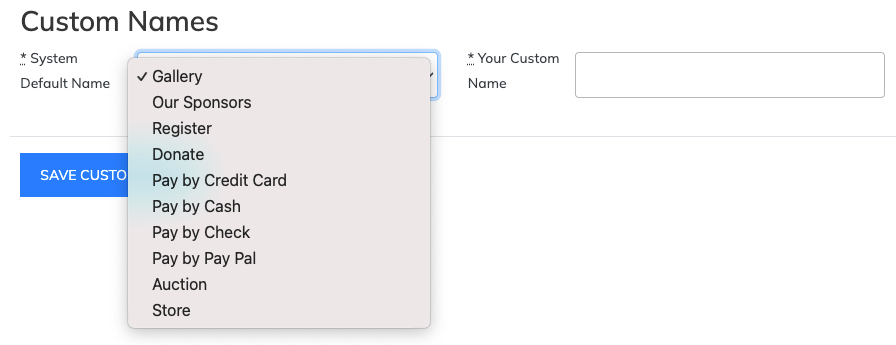
Current System Default Name choices include:
|
 |
Add a Custom Name
- Select Add New Custom Name.
- Select the item under System Default Name.
- Enter Your Custom Name.
- Save the Custom Name.
- Make sure Show On Website? is enabled when you want the custom wording to be used.
Important: Show On Website? does not enable or disable the underlying feature. It controls whether Event Caddy uses the Custom Name. If the Custom Name is not shown, Event Caddy uses the default system name instead.
For example:
- Changing Store to Sponsorships does not change what is sold through the Online Store.
- Changing Auction does not enable or disable the Auction.
- Changing Register does not open or close Player Registration.
- Changing Pay by Cash to e-Transfer does not create an e-Transfer integration.
The underlying feature remains configured in its respective Event Caddy area.
For Payment Option behavior, see Choosing and Configuring Payment Options.
Frequently Asked Questions
Should I use the Website Editor or Inline Website Editor?
Both editors update the same Tournament Website.
The Inline Website Editor (Beta) is the newer visual editing experience and includes functionality that is not available in the tab-based Website Editor. The existing Website Editor remains available if you prefer its tab-based workflow or need its current Additional Page URL Path control.
Do I need to make changes in both editors?
No.
Both editors work with the same underlying Tournament Website settings. Shared changes made in one editor are reflected in the other.
Can I customize an Additional Page URL?
Yes, in the existing Website Editor.
When creating or editing an Additional Page, use the URL Path field.
The Inline Website Editor does not currently provide this field.
How many photos can I upload?
The Photo Gallery supports up to 100 images.
The first six visible images in the current order appear on the homepage.
Can I hide a Downloadable File and still share its link?
Yes.
A hidden file is removed from the normal File Downloads display, but its direct File URL remains accessible.
Does “Show On Website?” in Custom Names hide the feature?
No.
It determines whether the Custom Name is used. If it is disabled, Event Caddy uses the default system name instead.
Can I rename Pay by Cash to e-Transfer?
Yes, if your tournament has access to that Payment Option.
Renaming it changes the checkout wording only. Event Caddy still treats it as the same manual Payment Option and does not process an e-Transfer automatically.
Are the Facebook, Twitter, and LinkedIn options links to my social profiles?
No.
They add sharing controls that let visitors share your Tournament Website through those services.