
The Inline Website Editor (Beta) lets you manage more than your homepage. You can create Additional Pages, add formatted page content and links, upload photos and downloadable files, and customize the labels visitors see in website navigation and checkout.
Changes update in the editor preview as you work. Depending on the panel, use its individual Save button or the main Save Changes button to publish your updates.
Important: Website labels control the wording visitors see. Changing a label does not change what the underlying feature does or whether that feature is enabled.
Table of Contents
- Create and Manage Additional Pages
- Add Links to Website Content
- Manage Your Photo Gallery
- Upload and Manage Downloadable Files
- Customize Labels and Navigation
- Frequently Asked Questions
Create and Manage Additional Pages
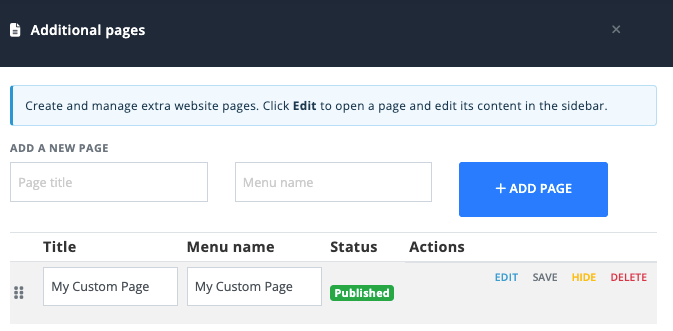
Additional Pages let you add custom pages to your Tournament Website for information that does not belong on the homepage.
Examples might include event rules, volunteer information, contest details, accommodations, directions, or other tournament-specific content.
From the Inline Website Editor, select Edit > Additional pages. You can also select Edit pages beside the page selector at the top of the editor.
Create an Additional Page
- Under Add a New Page, enter a Page title.
- Enter the Menu name visitors should see in the website navigation.
- Select Add Page.
- Select Edit beside the new page to open its content editor.
- Add the page content.
- Select Save page when finished.
The Page title and Menu name can be different. This lets you use a longer descriptive page title while keeping the navigation label shorter.
Edit Additional Page Content
Additional Pages use a rich-text editor similar to the homepage Main Content and Secondary Content editors.
You can add formatted content such as:
- headings and text formatting
- numbered and bulleted lists
- links
- images
- tables
- emoji
- embedded media
The page preview updates while you edit. Select Save page to publish the page-content changes.
Rename, Reorder, Hide, or Delete a Page
From Additional pages, you can manage existing pages directly from the list.
- Change the Title or Menu name, then select Save.
- Drag a page using its handle to change the page order.
- Select Hide to remove a published page from normal website navigation.
- Select Show to make a hidden page available again.
- Select Delete to remove the page.
The page list also shows its current status, such as Published.
Note: The Inline Website Editor does not currently provide a field for customizing an Additional Page URL or path.
Add Links to Website Content
The rich-text editors used for homepage content and Additional Pages include a link tool.
You can use links to send visitors to another page on your Tournament Website or to an external webpage.
- Open the content you want to edit.
- Select the text or image that should contain the link.
- Select the Link icon in the rich-text toolbar.
- Enter the destination.
- Confirm the link.
- Save the page or publish the outstanding changes.
Use descriptive linked text whenever possible so visitors understand where the link will take them.
For example, View Tournament Rules is more useful than Click here.
Manage Your Photo Gallery
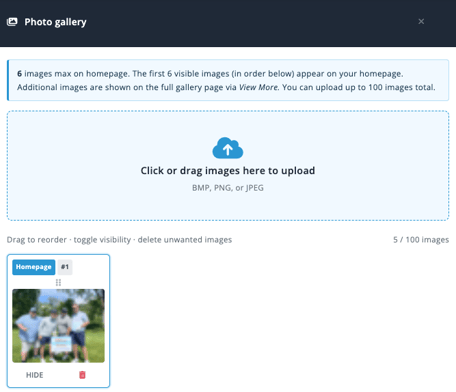
Select Edit > Photo gallery to upload and organize Tournament Website photos.
Event Caddy supports BMP, PNG, and JPEG images in the Photo Gallery.
You can upload up to 100 images total.
Upload Gallery Images
Drag image files into the upload area or select the upload area to choose images from your device.
Uploaded images are added to the Photo Gallery list below.
Choose Which Photos Appear on the Homepage
The first six visible images in the gallery order appear in the homepage Photo Gallery.
If you have more visible images, visitors can select View More to open the full gallery.
You can:
- drag images to change their order
- select Hide to remove an image from public display
- show a hidden image again
- delete an image you no longer need
The numbered Homepage indicators show which visible images currently occupy the six homepage positions.
For instructions on moving or hiding the entire Photo Gallery homepage section, see Customizing Your Homepage with the Inline Website Editor (Beta).
Upload and Manage Downloadable Files
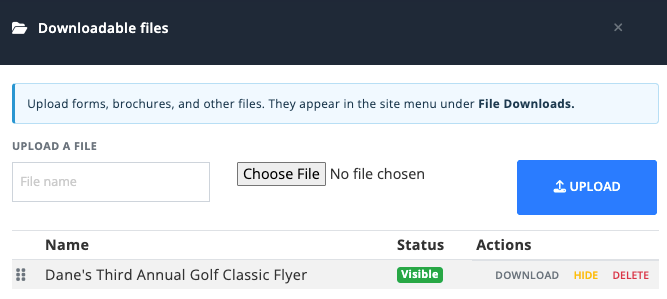
Downloadable Files let you provide forms, brochures, flyers, rules, PDFs, and other files through the Tournament Website.
Visible files appear on the website under File Downloads.
Select Edit > Downloadable files.
Upload a File
- Enter the File name visitors should see.
- Select Choose File and choose the file from your device.
- Select Upload.
Files can be up to 10 MB each.
Manage Uploaded Files
The file list shows each file’s Name, Status, and available actions.
You can:
- drag files to change their public display order
- Download a file
- Hide a visible file
- Show a hidden file
- Delete a file
A hidden file is removed from normal File Downloads display.
Important: Hiding a Downloadable File does not invalidate its existing direct file URL. Anyone who already has the direct URL can still access the file.
This can be useful when you want to link directly to a file without listing it publicly on the Tournament Website.
For example, Event Caddy Email Blasts do not support traditional file attachments. A Downloadable File can instead be shared through a link from an email. See Sending Emails with Communication Tools.
Customize Labels and Navigation
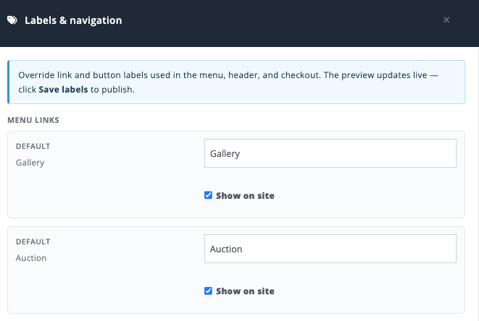
Select Edit > Labels & navigation to customize wording used in Tournament Website navigation, header buttons, and checkout.
This is the Inline Website Editor replacement for the Custom Names settings in the existing Website Editor.
Available Labels
Current customizable labels are grouped into three areas.
| Area | Default labels |
|---|---|
| Menu links | Gallery, Auction, Our Sponsors, Store |
| Header buttons | Donate, Register |
| Checkout payment labels | Pay by Credit Card, Pay by Cash, Pay by Check, Pay by Pay Pal |
Enter the wording you want visitors to see as the Custom label.
When finished, select Save Labels.
Understand the “Show on site” Setting
The current Show on site wording can be misleading.
Important: Show on site does not enable or disable the feature, menu destination, header action, or Payment Option. When Show on site is selected, Event Caddy uses the default label. Clear it when you want Event Caddy to use your Custom label instead.
For example:
- Renaming Store to Sponsorships does not change the Online Store into a different feature.
- Renaming Auction does not start or stop the Auction.
- Renaming Register does not open or close Player Registration.
- Renaming Pay by Cash does not enable or disable Cash as a Payment Option.
The underlying feature remains configured in its owner area of Event Caddy.
Renaming Payment Options
Checkout payment labels change only the wording purchasers see.
For example, a PRO or ELITE organizer might rename Pay by Cash or Pay by Check to represent a manual method such as e-Transfer or ACH.
Renaming the label does not create a new payment integration. The method remains a manual Payment Option and follows its existing payment behavior.
For Payment Option setup and availability, see Choosing and Configuring Payment Options.
Frequently Asked Questions
Can I create more than one Additional Page?
Yes. You can create multiple Additional Pages and use separate Page title and Menu name values for each one.
You can also reorder, rename, hide, show, edit, or delete the pages from Additional pages.
Can I customize an Additional Page URL in the Inline Website Editor?
No. The Inline Website Editor does not currently provide a field for changing an Additional Page URL or path.
How many images can I upload to the Photo Gallery?
You can upload up to 100 images.
The first six visible images in the current order appear on the homepage. Additional visible images are available through the full Photo Gallery.
Can I choose which six Photo Gallery images appear on the homepage?
Yes. Drag the images into the order you want.
The first six visible images become the homepage images.
How large can a Downloadable File be?
Each uploaded file can be up to 10 MB.
Can visitors still access a file after I hide it?
Yes, if they have its direct file URL.
Hiding a file removes it from the normal File Downloads display but does not invalidate an existing direct link.
Does “Show on site” turn a website feature on or off?
No.
In Labels & navigation, Show on site controls whether Event Caddy uses the default label rather than your Custom label. It does not enable or disable the underlying website feature or Payment Option.
Can I rename Pay by Cash to e-Transfer?
Yes, with a plan that supports the Cash Payment Option.
Changing the label does not create an e-Transfer integration. Event Caddy still treats it as the same manual Payment Option.